Happy DIY Wednesday everyone!!!
Today‘s DIY tutorial is brought to you by our guest blogger Vanessa! Check out the awesome DIY Paper Pomander inspiration feature she did last week (in case you missed it) here. Now Vanessa is going to give us her own tutorial on how to make a DIY Paper Pomander! Take it away Vanessa …
How-To Make a DIY Tissue Paper Pomander
Here is a great DIY project that you could use to decorate your Spring/Summer wedding or bridal shower. You can make really big ones (8-by-20 inch) and hang them from your ceiling or on the wall. They can even be used as napkin holders which is what the following tutorial shows you how to do.
 Materials:
- Ruler
- Scissors
- Floral Wire
- Tissue Paper
Step 1: Lay out your tissue paper. Cut out a 5-by -10 inch rectangle. Make sure you use all the layers of tissue.
Step 2: Fan fold the 5”x10” of tissue. (I used a half inch fold)
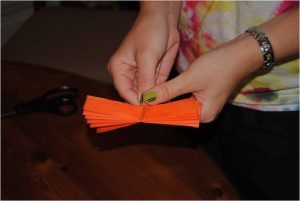
Step 3: Cut an 18” piece of floral wire and the wrap it around your fan folded.
Step 4: Fan out the paper on each side of the wire.
Keep reading to get the rest of the tutorial!
Step 5: Start to separate each layer of tissue paper (As you can see my cat, Remy decided to make an appearance there in the background).
Step 6: Continue separating the layers.
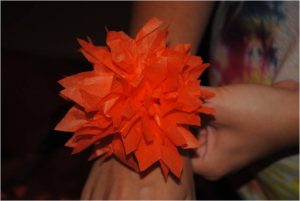
And finally … the finished product!!






4 comments
Oooh! So useful and pretty! Thanks for sharing this, I am DEF going to make some of these.
Omg so amazing!!!!!
We made a TON of these for my wedding!! Sadly, we didn’t end up using them :( I had a lot of awesome decorations that never were set up or used, and it really bummed me out.